- An attribute is the information we gather about an entity. Eg: Name, Truck number, Mobile number.
- Click on the Admin -> Modules -> Required Module -> Attributes
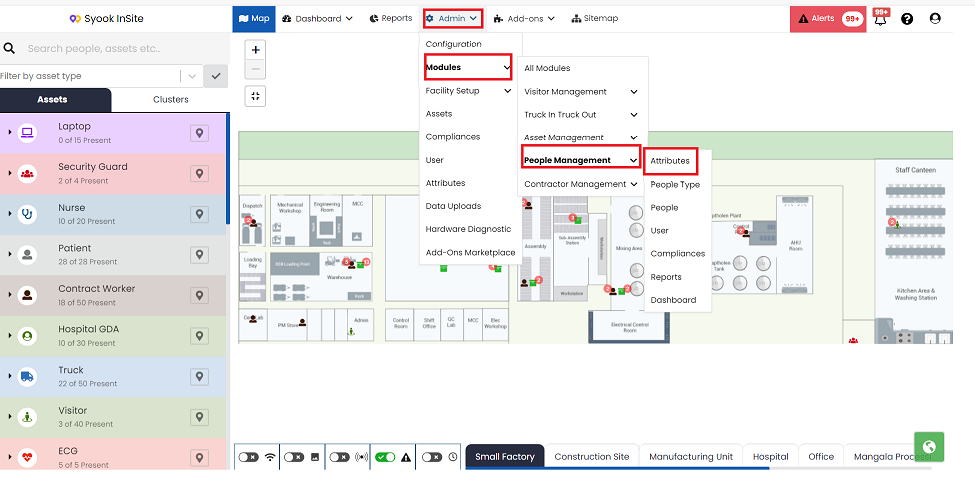
- Click on the Attributes as shown above.
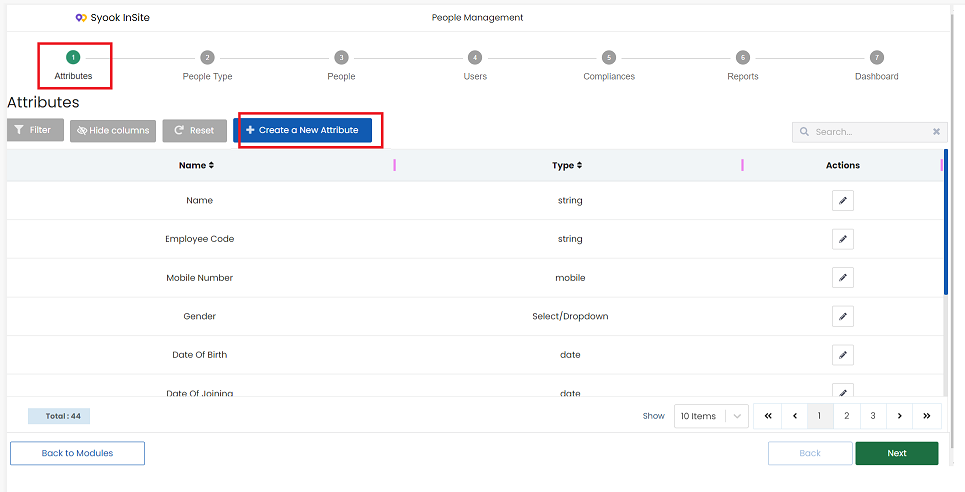
- Click on the + Create a New Attribute
- The below screen appears
- Enter the name and select the type
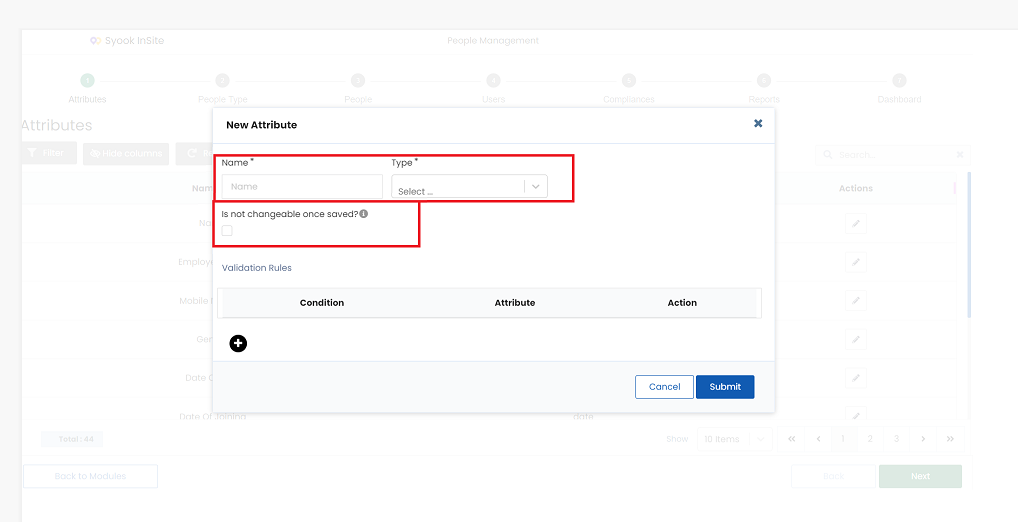
- ‘Is not changeable once saved’ - If this is checked, then the attribute value cannot be changed once it is saved.(Attribute value cannot be modified. Only once, it can be saved)
- Once values are assigned to the entity attributes, then the attribute type cannot be changed.
Types Of Attributes
- String
- Number
- Mobile
- Boolean
- Date
- Date-time
- uri
- Text area
- Select / Drop down
Attribute Validation
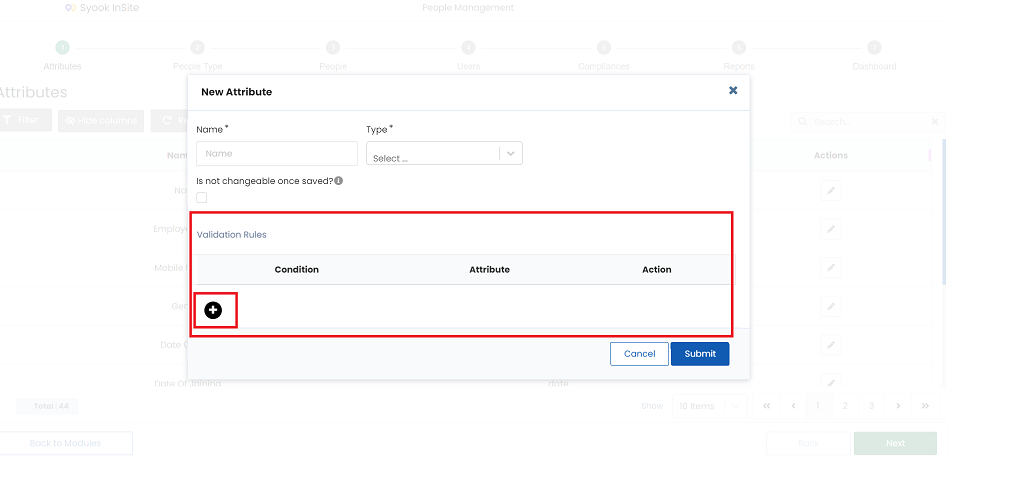
- Validations can be set for the attributes by clicking on the + symbol as shown below.
The below validations are available.
Present - this validation can be applied for all types of attributes.
The below validations can be set only for the same type of attribute. If the attribute type which is created / modified is Datetime, validations can be set for the similar type of attributes.
Eg: If Dock out is less than / greater than Dock Out time(or any other datetime attribute). It cannot be done for any other type of attribute like string
Less than
Greater Than
Equals
Not Equals
String Attributes
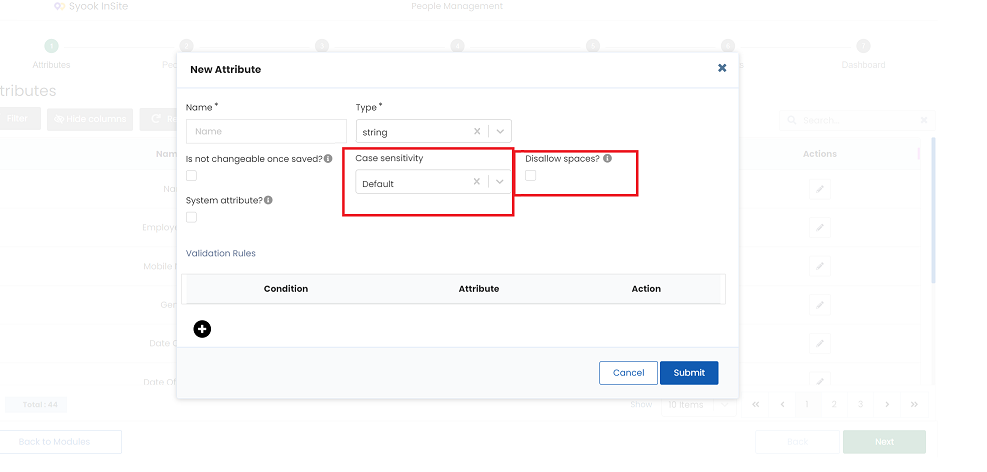
- Case sensitivity and Disallow spaces options are allowed as shown above.
- If lower case is selected, all characters will be shown only in Lower case.
- If upper case is selected, all characters will be shown in upper case.
- If default is selected, both lower case and upper case characters can be used.
- If disallow spaces is selected, then spaces cannot be given in between characters.
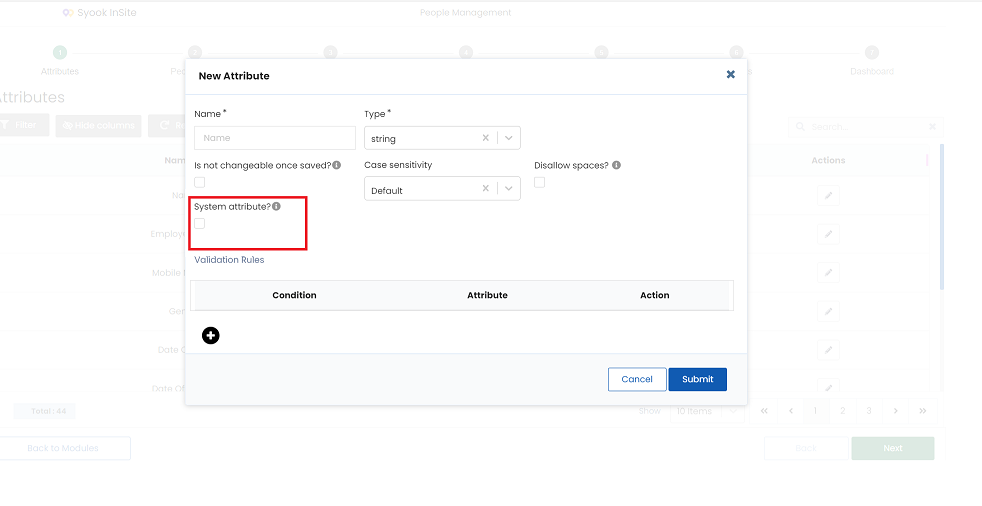
- When the type is selected as a string, it will show ‘System Attribute’ as shown below
Drop Down Attributes
- Add the required values to be shown in drop down.
- When drop down is selected, it gives the option to select if drop down needs to be a string or number as shown below.
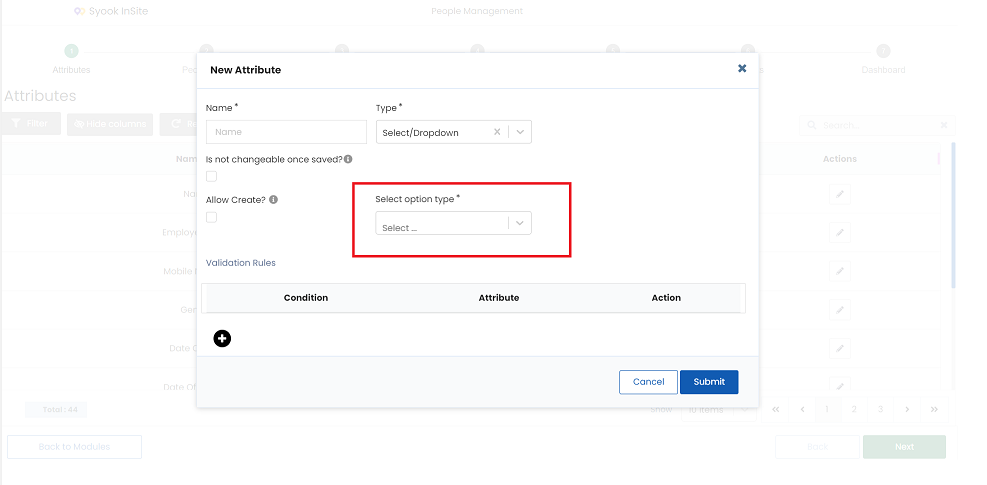
- Select either string or number
- When multiple values need to be added for drop down, click on the Download Template button as shown below.

- Enter the required values in the downloaded excel sheet and upload it to add values to the drop down.
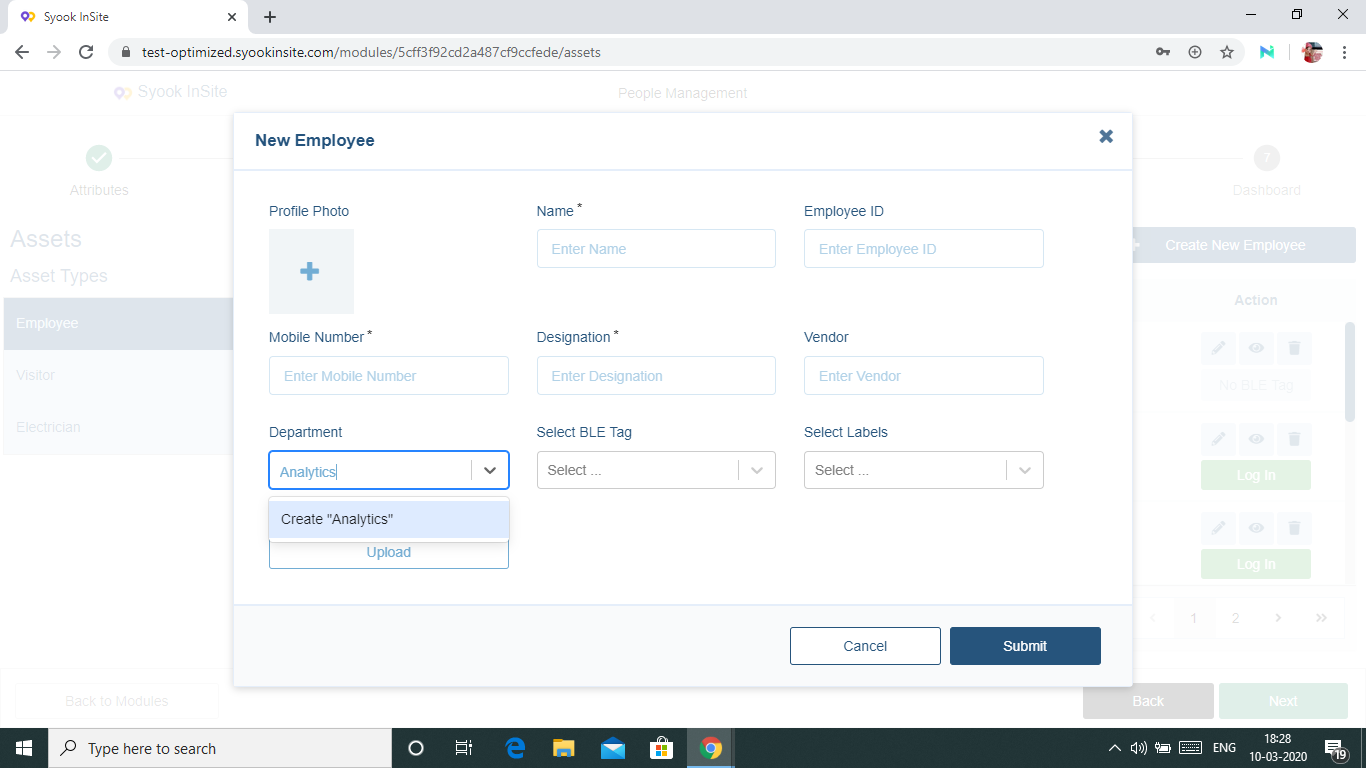
- When the ‘Allow Create’ checkbox is checked, it allows you to create values for drop down directly in the entity form.
- Refer to the image below shown in entity form which creates values for drop down directly.
Boolean Attribute
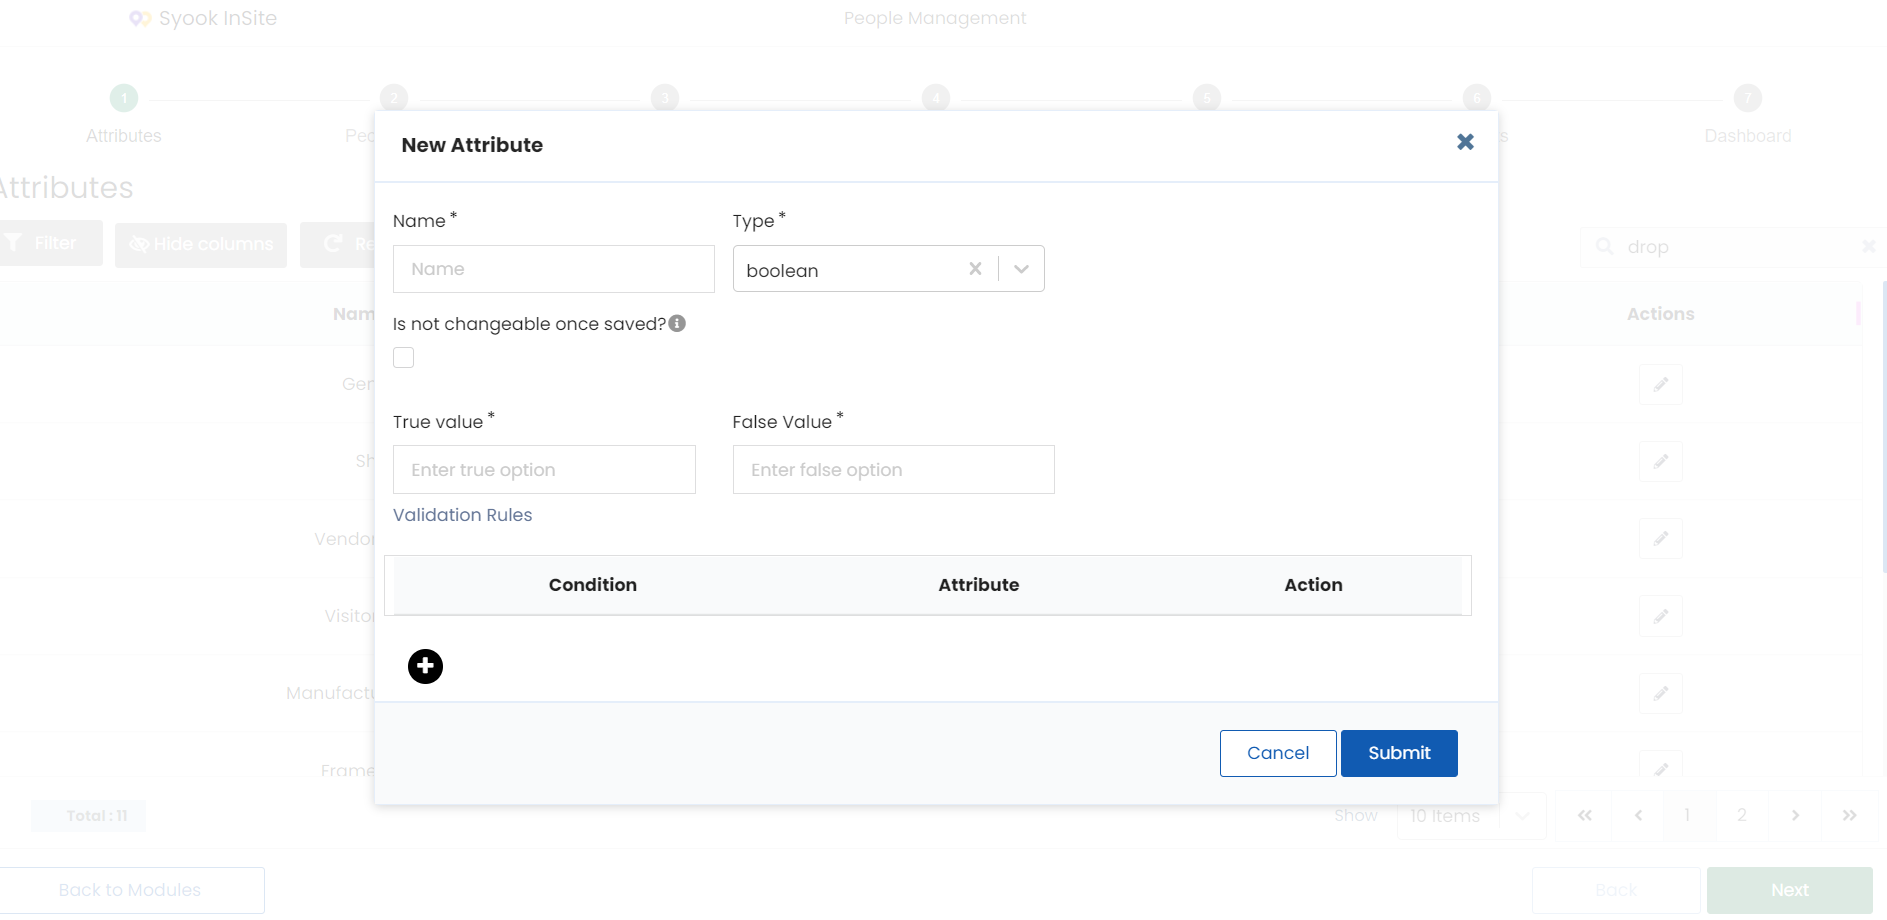
- Add the required True and False values to be shown in the entity form and click on the Submit button.
Other Attribute Types
- For other types of attributes like date, time, datetime, email, number, etc enter the name of the attribute and select the required type and click on Submit.
- For date-time attributes, users can choose if they want to change the date-time when clicking on the datetime field or only current time needs to be updated.
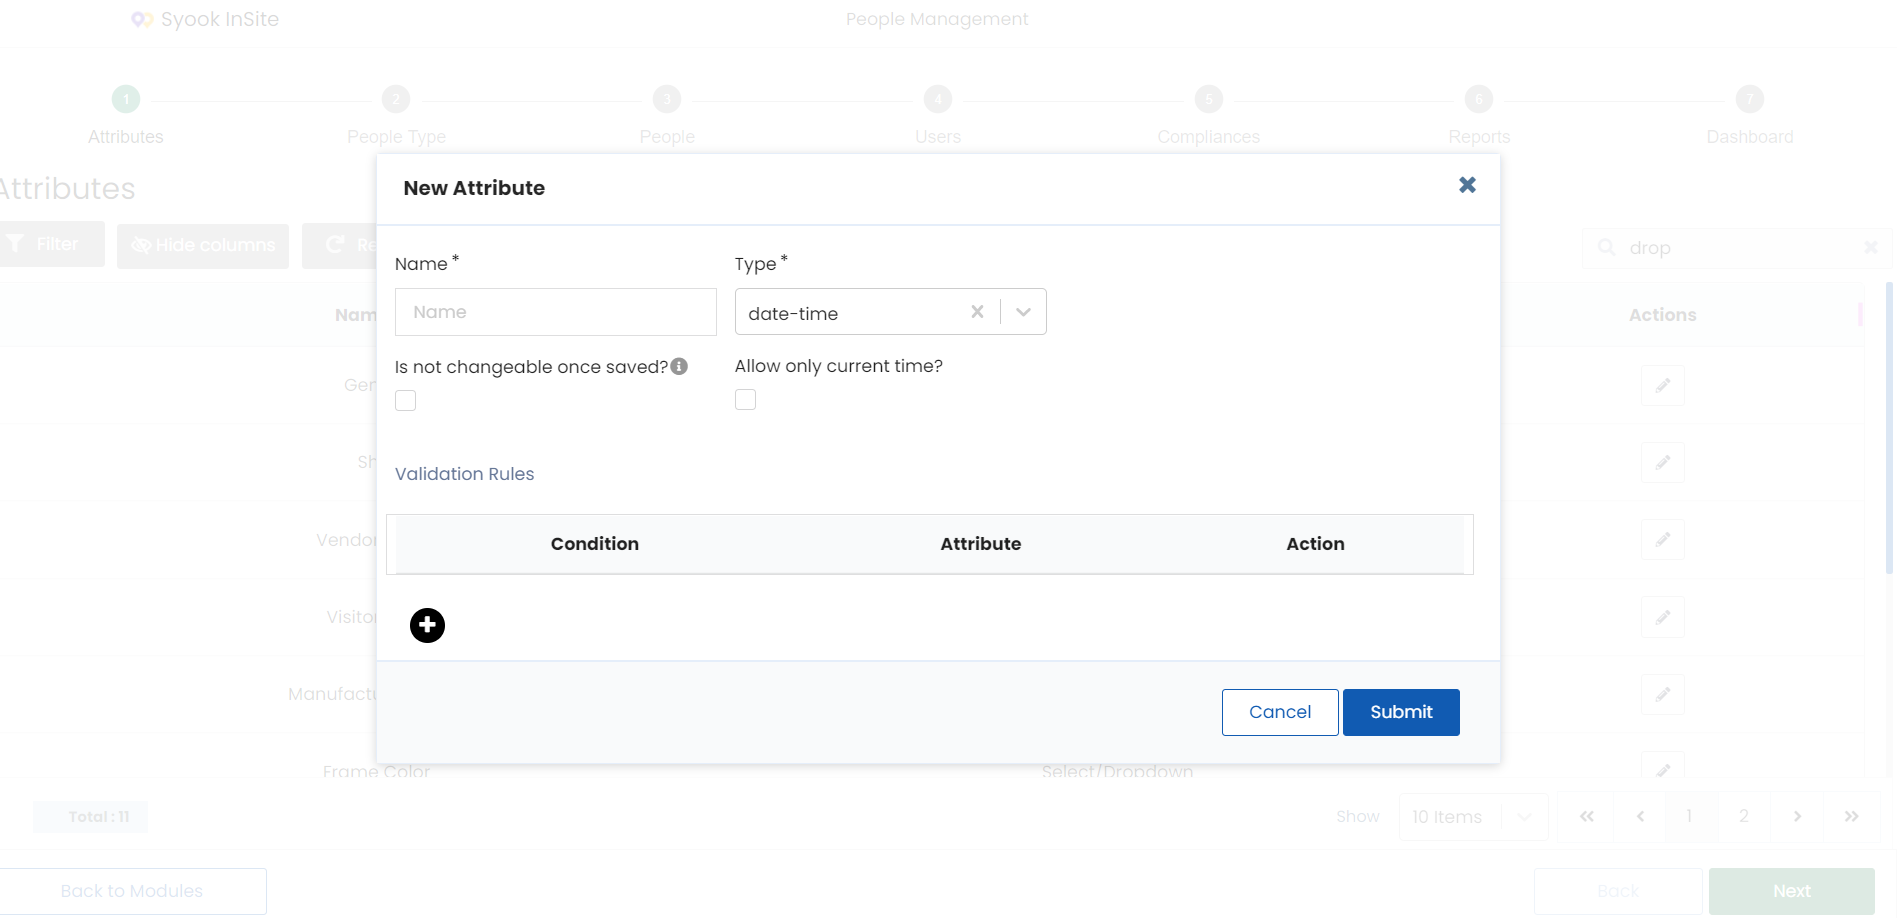
- If 'Allow only current time' is selected, cannot change the date and time. Only current date and time will be populated.
Edit Attribute
- Click on the edit icon against each attribute and do the necessary changes.
- Attributes once created can only be modified, but cannot be deleted.
- Once values are assigned to the attributes for the entities, the attribute cannot be changed anymore.
Click on the Next button to go to the next step Entity Groups.