- Enabled Entity Groups in 2nd step of Module setup will be available here to create entities.
- Click on the Entity as shown below.
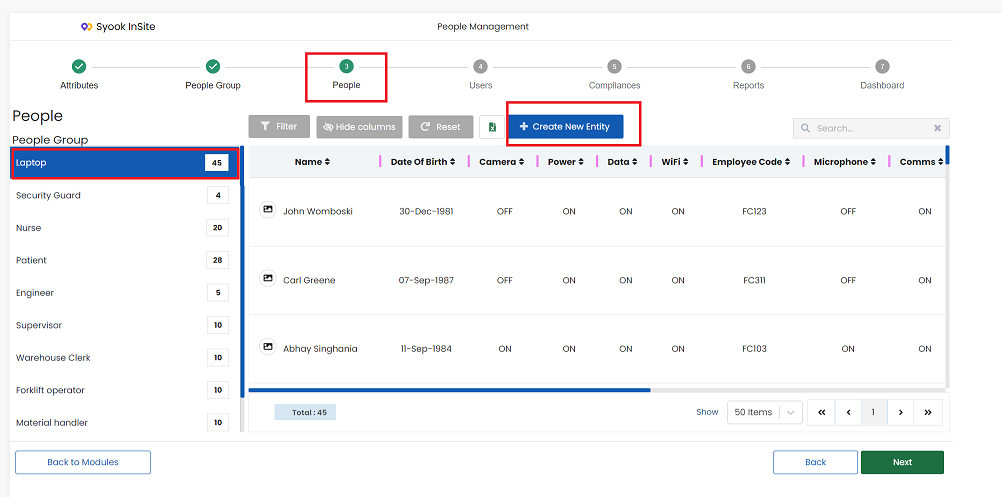
- Click on the + Create New Entity

- Attributes selected in entity group configuration will be available here
- Profile photo can uploaded from computer or a real photo can be clicked by clicking on the camera image as highlighted above.
- Enter the attribute values
- Select the tag assigned to the asset.
- Based on the tags created in the Admin -> Facility Setup -> Tags management, different types of tags will be available in the select tag drop down.
- In the Label field, select the required label.
- If a new label needs to be created, enter the new label name and ‘Create “label name” ’ will be shown in the drop down.
- Clicking on that, the label can be created.
- Click on the Submit button.
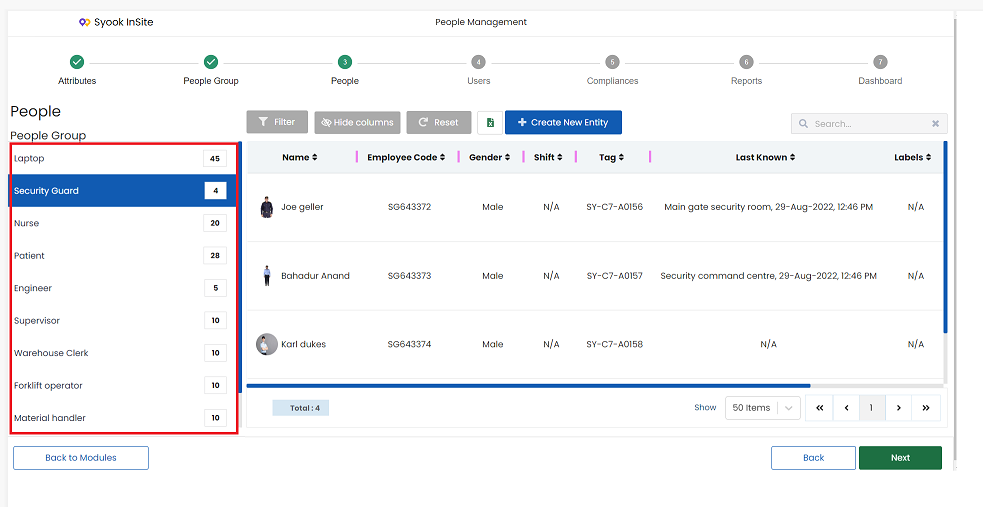
- Click on the different entity groups, shows the entities of that entity group, as shown below.
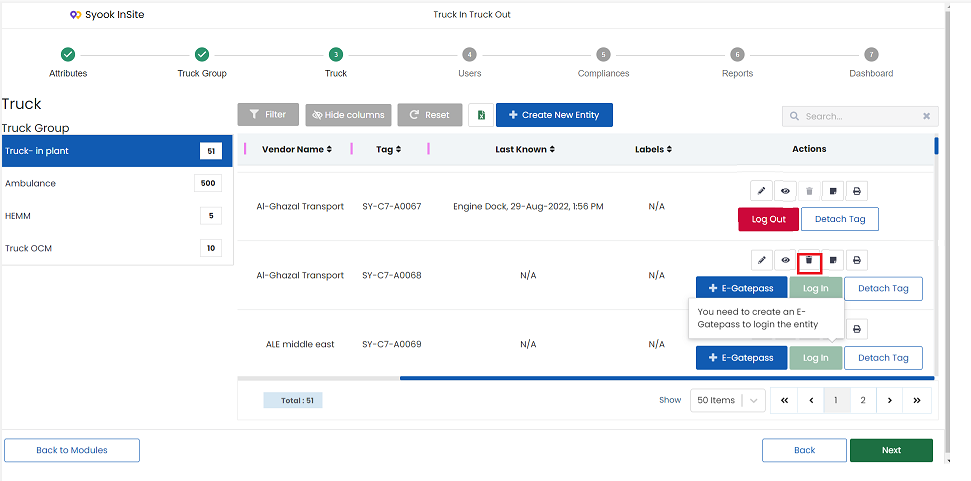
- If ‘login without Tag’ is enabled in Admin -> configuration -> Login Logout, without tag assignment, the entity can be logged in. But it cannot be detected.
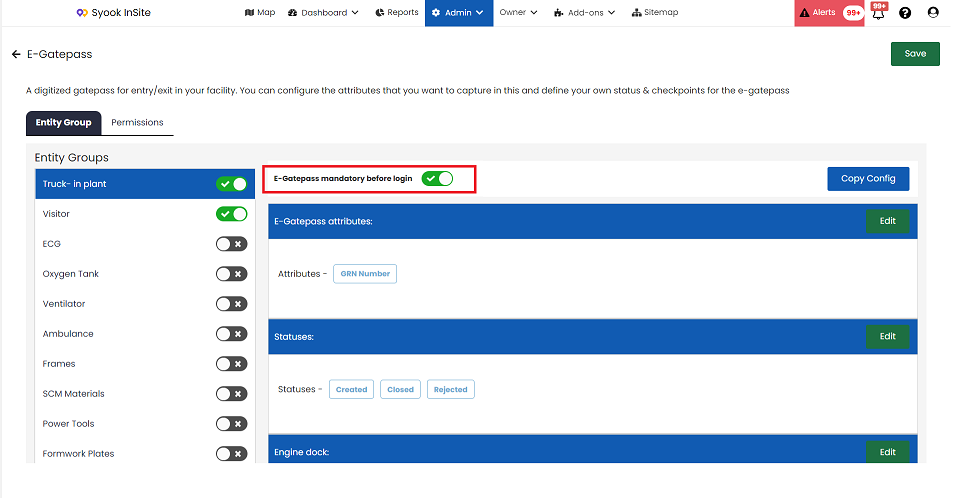
- If E Gate pass Add-on is enabled in Admin -> Add-ons Marketplace -> E Gate pass, it provides an option to create / edit e gate pass( for the enabled entity groups).
- For the entity groups for which E Gate pass is enabled, configuration can be done to make E Gate pass mandatory before login.
- If E Gate pass is not enabled, entities can be logged in without creating an E-Gate Pass.
E Gate Pass and Checkpoint
- Once an entity is created, it shows a pop up asking if the E gate pass needs to be created(This is shown if E Gate pass is mandatory before login. Refer Admin -> Addons Marketplace -> E Gatepass) as shown below.

- Clicking on ‘Yes’ in the above screen, shows the below form to create an e-gate pass and add checkpoints.
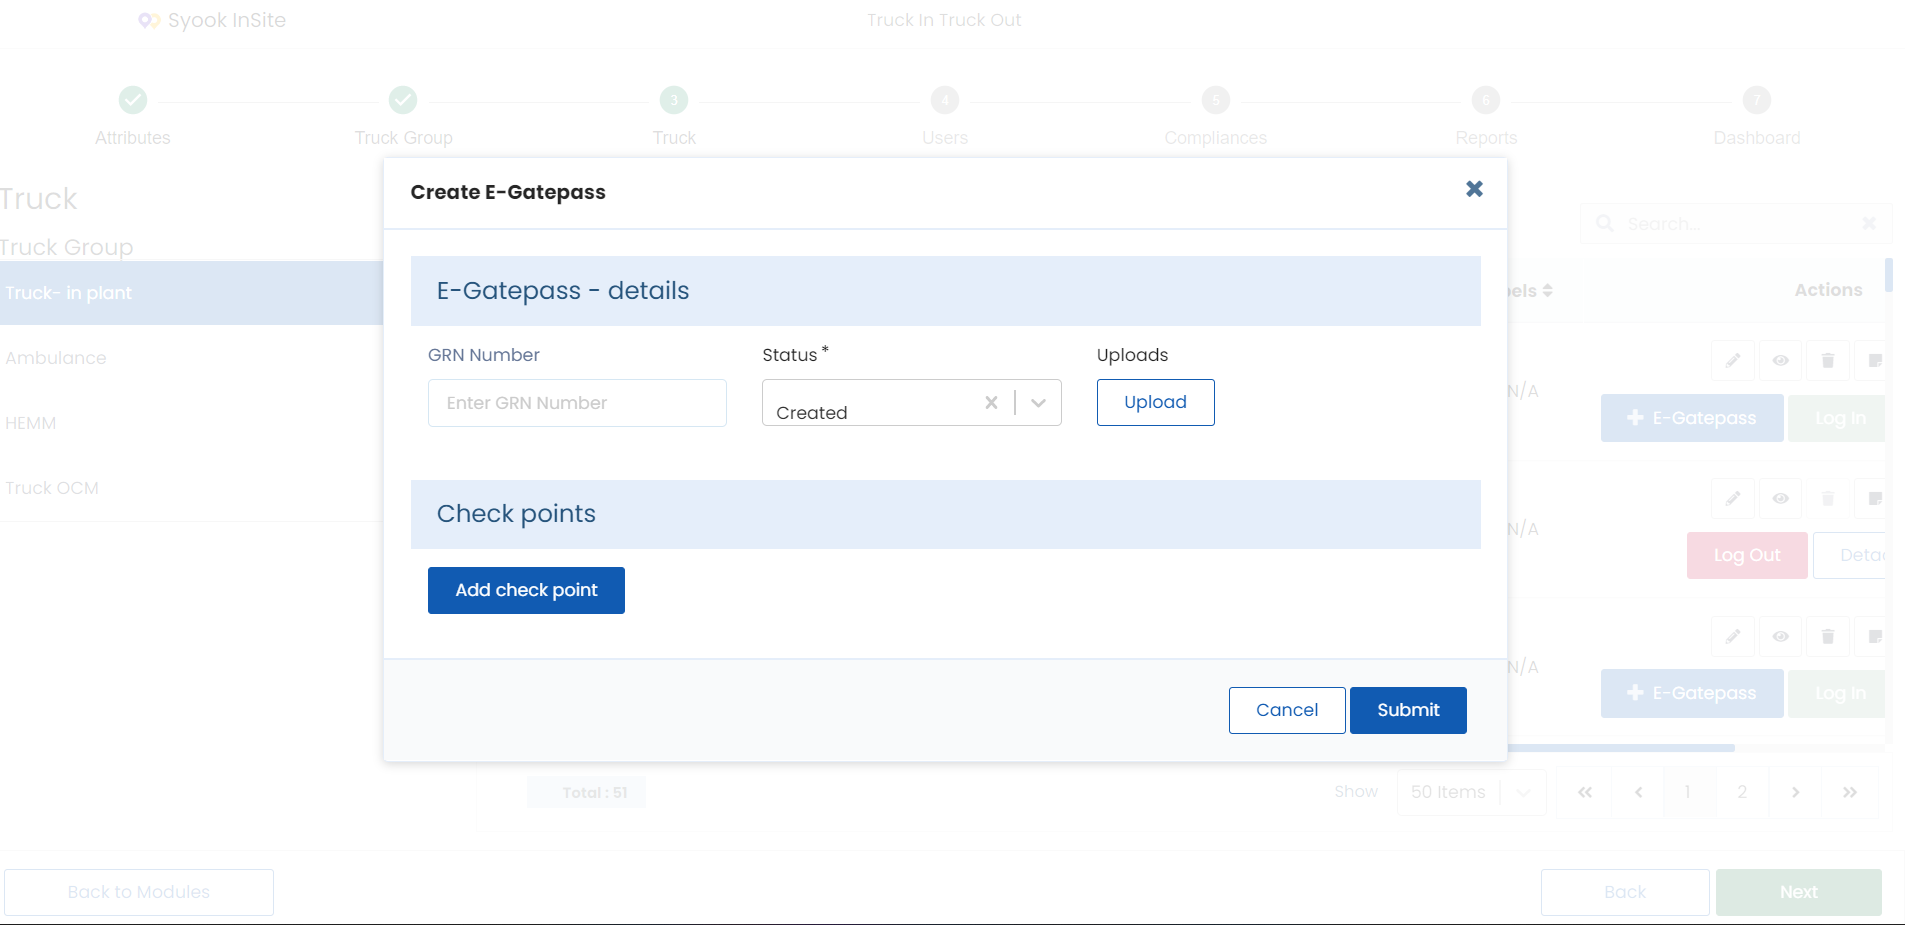
- Enter the required details for e-gate pass
- Select the required checkpoint from drop down as shown above.
- Once the checkpoint is selected, the below screen appears to enter the checkpoint details.
- If required, attachments can be uploaded for E Gate pass and checkpoints.
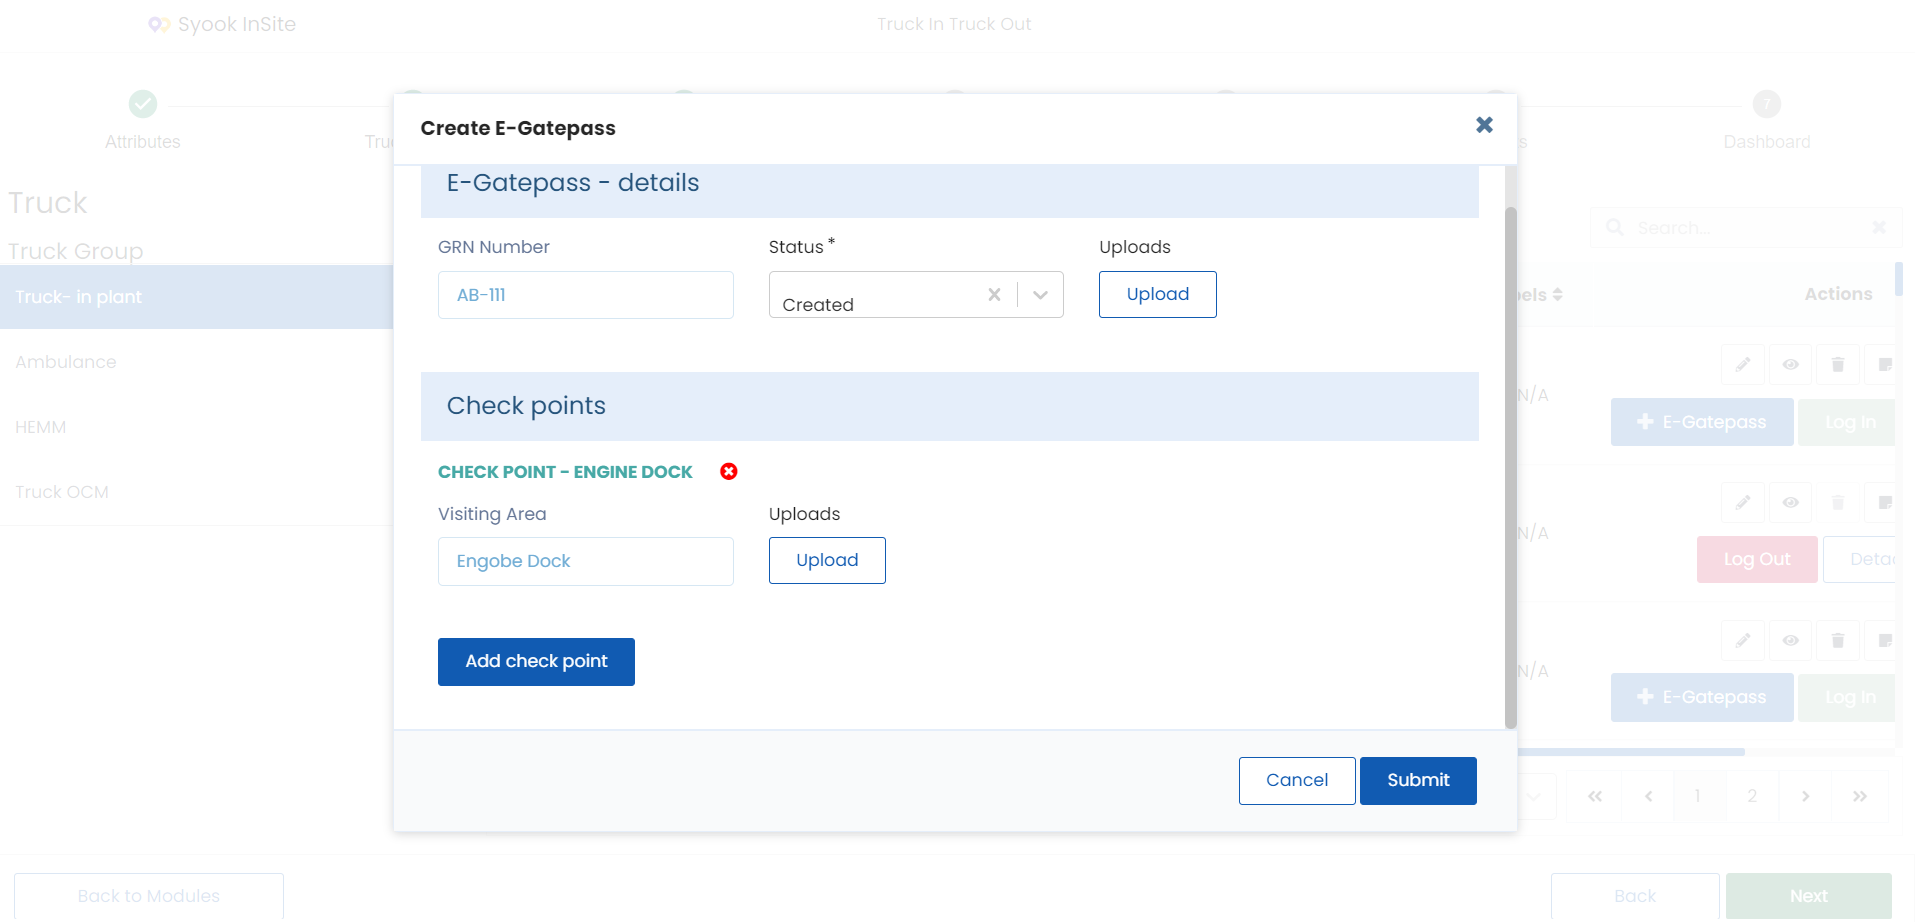
Enter the required and mandatory fields for the checkpoint
Click on Submit to create an e-gate pass.
Once the entities are created, an option to edit, delete entities and Download and Print stickers are available. In the sticker, entity details like mandatory and main attributes will be available.
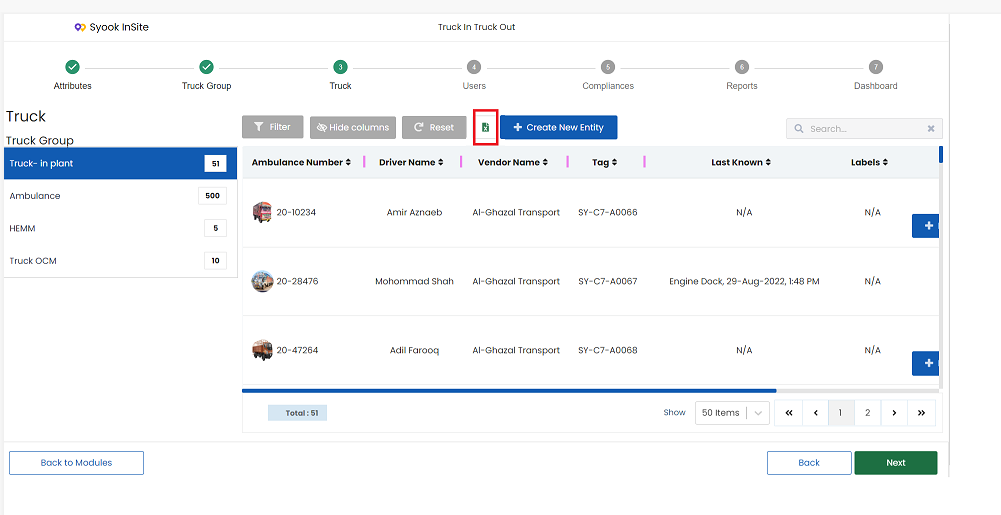
Download entities in Excel
Assets can be downloaded in an excel sheet by clicking on the excel icon as shown below.
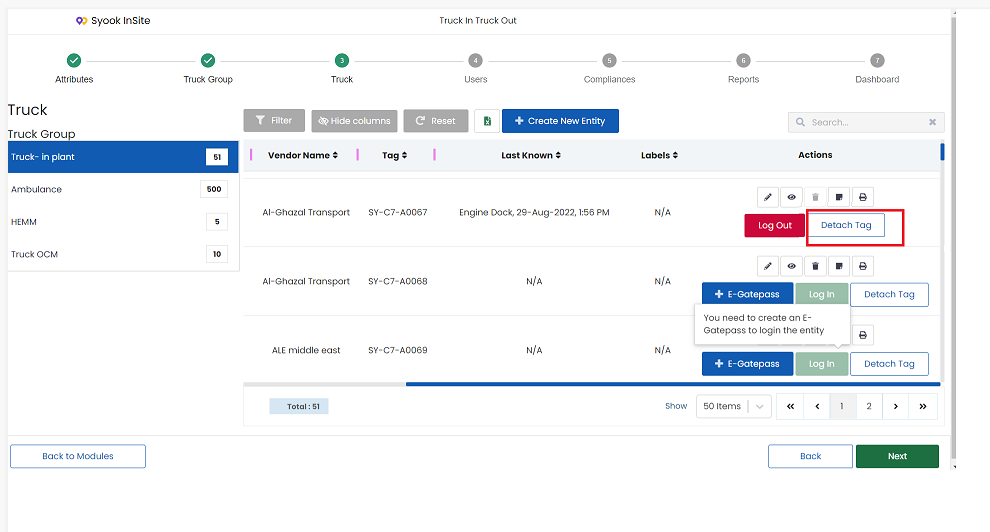
Detach Tag
- Option to detach the tag is available for each asset as shown below.
- Click on the Detach tag button to detach the tag from the entity.
Edit and Delete Entity
- Entity details can be modified by clicking on the edit icon as shown below.
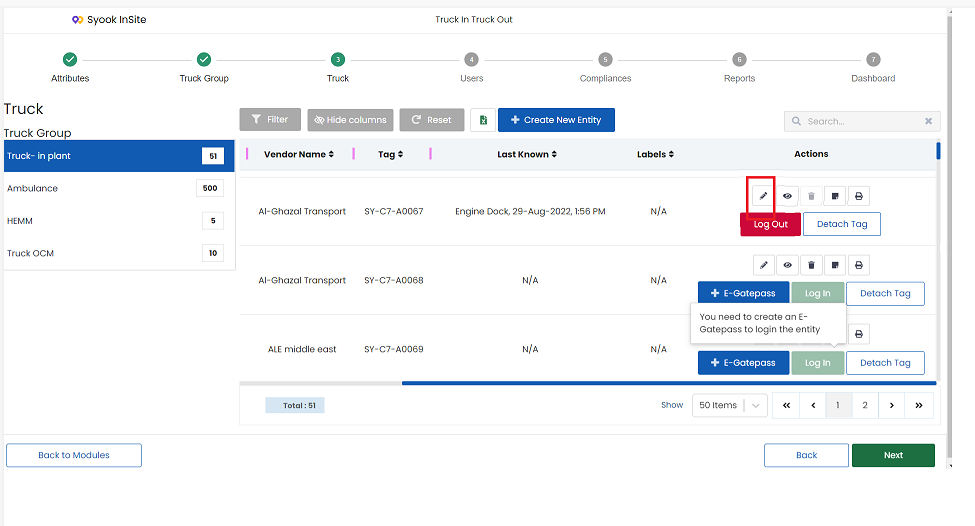
- Entity can be deleted by clicking on the delete icon.
- An entity can be deleted, only when it is logged out
Entity Trends and Timeline Records
- Click on the eye icon as shown below.
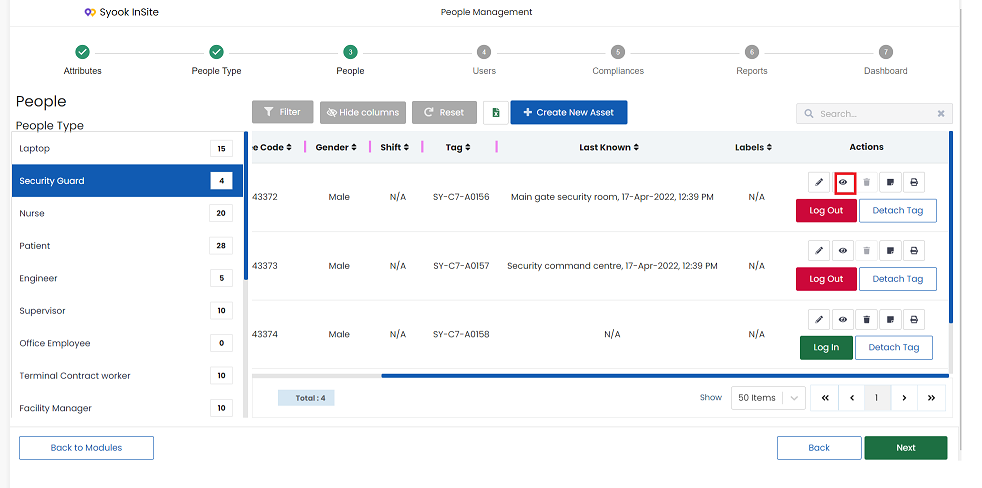
- It shows the Entity trends and Timeline Records.
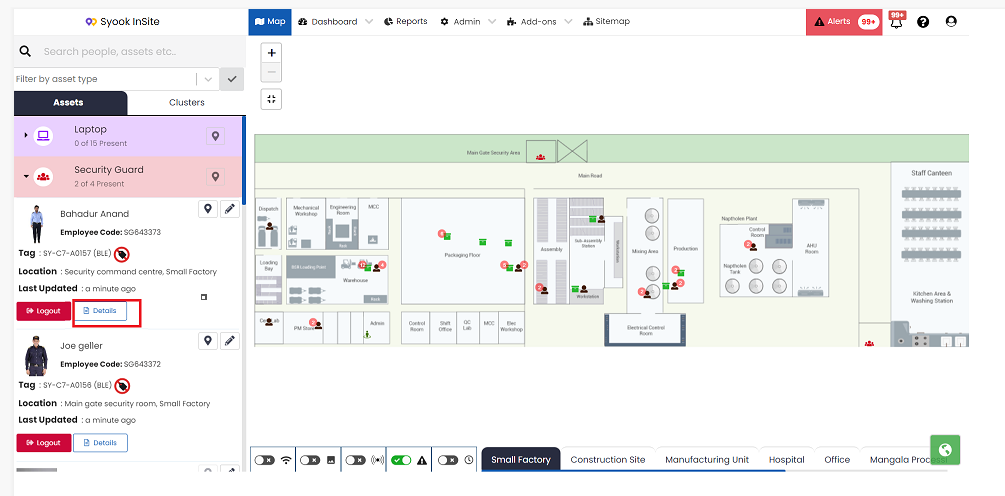
- Else in the Digital map, click on the Details button of the required entity as shown below.
Refer the link below for more details about the entity trends and timeline records.
Entity Trends and Timeline records